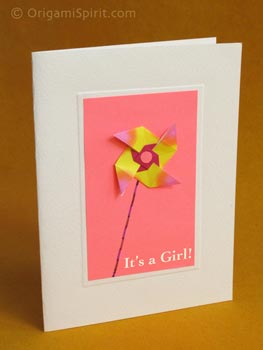
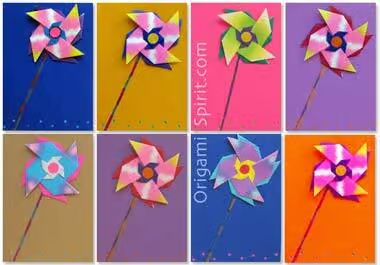
When making greeting cards, I like to keep myself open to the many creative possibilities offered by traditional and simple origami models. In this post we’ll look at one example of using the traditional origami windmill to create different cards.
Note for beginners:
If you’re just getting into folding, the video below will show you how to fold the windmill, and make the card.
Note for more advanced folders:
If you just want to see how to emboss and put the card together, skip to minute 4:08 of the video.
Materials and tools:
- A folded blank card, 6 x 4.5 inches.
- A colored card, 2.5 x 4 inches.
- An origami windmill folded from a 2 x 2-inch square
- An origami windmill folded from a a 3/4 x 3/4-inch square
- Glue.
- Color pencils.
- Hole punch.
- Embossing sheet (made with a 2 3/4 x 1/4-inch card pasted on the center of a 6 x 4.5-inch card)
- A small spoon or bone folder.
Steps:
- Paste the smaller windmill over the bigger one.
- Paste a tiny circle made with a hole punch on the center of the smaller windmill.
- Draw a slanted stick on a colorful card, 2.5 x 4 inches.
- Paste the windmill at the end of the stick.
- Make a central embossing on the 6 x 4.5 card (see how at minute 7:45 of the video).
- Paste the colored card on the embossed rectangle.
Tips and suggestions:
- Recycle colorful gift wrap to make the windmills.
- Try different shapes and proportions for the card.
- Make a blue card to announce the birth of a boy.
- Make a pink card to announce the birth of a girl.
- Use the card as a birthday or get-well greeting.
- Make Artist Trading Cards
Do you live in the northern hemisphere? Today is the summer solstice!
I hope sunny and warm breezes blow your way
and keep your windmills spinning. Have a happy summer!


thank you very much for your beautiful videos! so many great ideas!
You are welcome Evi, thank you for your visit.
Love the video. I’ve never tried embossing, but NOW I will!! Thanks, Leyla!!
Nice demo on embossing,very creative.Thank You for sharing
Beautiful simplicity! I like the idea of adding another windmill behind to suggest depth and movement. Also, nice demo on embossing. Well done video!