


Raise your hand if you enjoy making modular origami! You will fave fun folding these interlocking rings to make the Olympic rings or to make a slinky toy. Here you will find an Easy-to-follow video tutorial.
The Olympic rings and flag are used by the International Olympic Committee (IOC) as a symbol to elevate the Olympic Games.
“The rings are five interlocking rings, colored blue, yellow, black, green and red on a white field, known as the “Olympic rings”. The symbol was originally created in 1913 by Coubertin.] He appears to have intended the rings to represent the five continents: Europe, Africa, Asia, America, and Oceania. The colors of the rings together with the white of the background included the colors composing every competing country’s flag at the time.”
Wikipedia
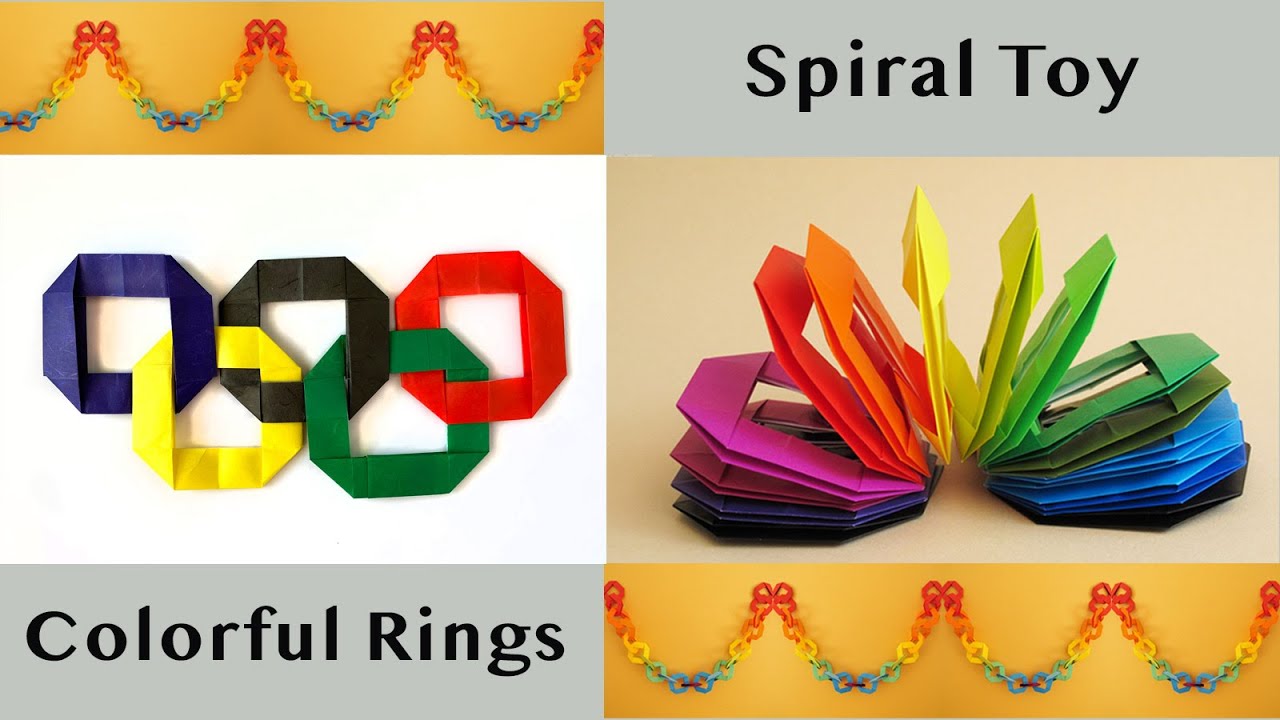
- Laura Kruskal Created the modular ring. You can make many of these rings and link them together to form a decorative garland.
- Gay Merrill Gross Joined many of Laura’s modules in a unique way to create the spiral spring, a graceful rendition in paper of the Slinky, a classic toy.
- Leyla’s idea: These origami rings can be used to make Olympic rings. We just have to choose the appropriate colors (from left to right: blue, yellow, black, green, and red) and we are all set!
Here is the video tutorial on how to make these interlocking rings.
Tips and suggestions for making the Olympic rings
- You need five squares of kami paper: blue, yellow, black, green, and red. In the video, it is demonstrated using solid-color origami paper*.
- Cut each square in half to get two rectangles (2:1)
- Make a ring with each pair of modules as explained in the video, leaving one end open.
- Connect the rings in the appropriate order. The Olympic rings are interlaced from left to right; the blue, black and red rings are situated at the top, the yellow and green rings at the bottom.
- Once they are connected, you can arrange them so that the blue, black and red rings are above and the yellow and green, below.
- Leave them under a heavy book overnight so that the are very flat.
Diagrams for these and a selection of innovative, simple and splendid origami models,
are found in Origami: The Art of Paper Folding, a book by Gay Merrill Gross*.
If you fold a set of Olympic rings, join and share your fold in our Facebook Group Click Here to Join
* Disclosure: This post contains affiliate links through which we receive a small commission. Purchasing through them does not represent an additional cost to you. Thank you for your support. Read more here.
Fairly easy Thank you !!!
You are welcome, Maxine. I’m glad you find these rings easy to make!