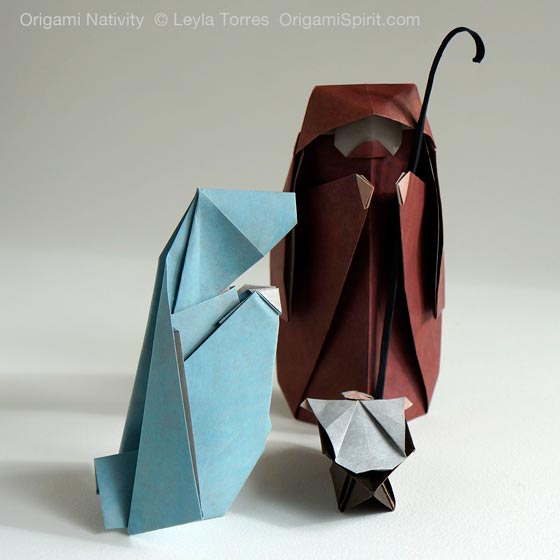
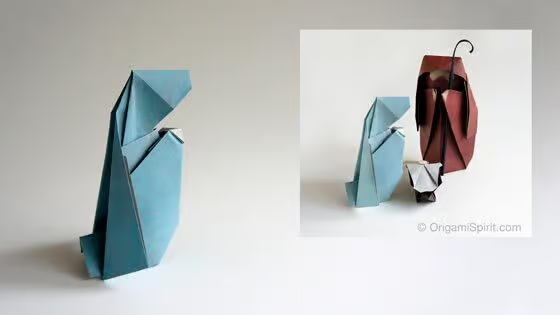
Sacred family in a Nativity Scene. Origami figures by Leyla Torres
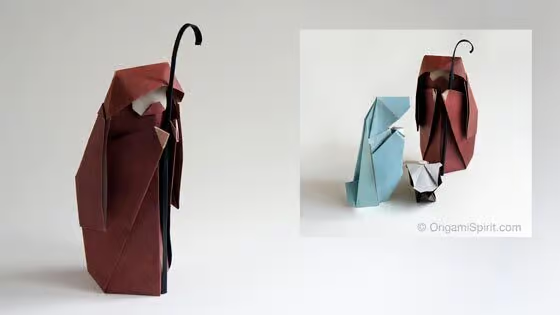
These figures of the child and crib are part of the origami Nativity Scene series. In two previous posts I’ve shown how to make the figure of Joseph and his staff, and Mary.
In my native Colombia the tradition is that baby Jesus is the one who brings the Christmas presents. I remember one particular Christmas when I was only four years old. I woke up early that day and there it was, perched at the foot of my bed: a large red tricycle, my present that year from Baby Jesus.
My father placed the tricycle on the floor and sat awkwardly on the seat. His big feet scrunched up on the pedals, his knees almost touching his ears. I’ve never forgotten that Christmas, my Dad showing me how to ride a tricycle. It’s a warm and cozy memory that I’ll never forget.
Here is the video tutorial to make this origami baby Jesus and crib. I hope making this Sacred Family in origami contributes to your own warm memories of Christmas!
Tips and suggestions for making the figure of the Child and the Nativity Scene in origami
- The finished figure shows both sides of the paper.
- Paper known in the US as “kami” is a good choice, but it can be made with heavier papers.
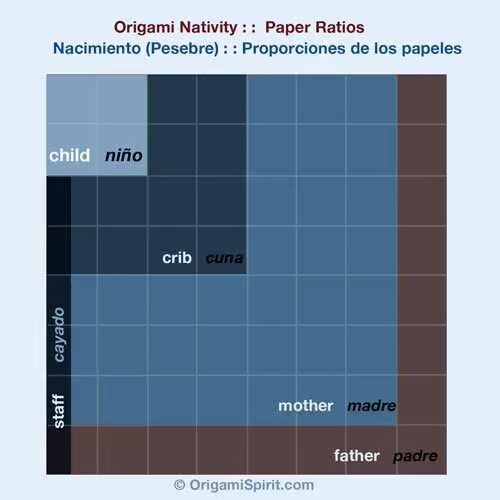
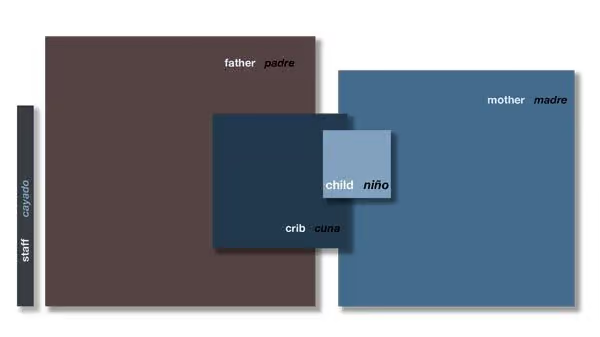
- Paper size for the baby: the side of the square has to measure 1/4 of the side of the one used to make the father figure. The video will show how to cut it to the appropriate size.
- If you have paper of the same color on both sides, before folding, you can color the paper by hand as described in this post.
- The crib is based on the traditional “Water Bomb”.
- As for paper size for the crib, the side of the square has to measure 1/2 of the side of the one used to make the father figure. The video will show how to cut it to the appropriate size.
- Here is a diagram of the proportion of the papers for each figure. The videos explain how to cut it.
The following videos will show you how to make the other figures of the Nativity Scene:
Origami Joseph for the Nativity Scene
Click here for blog post and video tutorial
. . . . . . . . . . . . . . . .
Origami Mary for the Nativity Scene
Click here for blog post and video tutorial
. . . . . . . . . . . . . . . .
Nativity Scene in different languages:
• English: Nativity, Creche • Spanish: Nacimiento, Pesebre, Portal de Belén, Misterio
• German: eine Krippe, Weihnachtskrippe, • French: La crėche de Noël
• Portuguese: Presépio • Italian: Presepe • Dutch: Kerststal
Sacred family in a Nativity Scene. Origami figures by Leyla Torres
. . . . . . . . . . . .
If you like what you find here at Origami Spirit,
please support our work with a donation.
Whatever the amount, we appreciate your helping us
to continue providing you with quality origami content and video tutorials.
CLICK HERE TO MAKE YOUR CONTRIBUTION
. . . . . . . . . . . .


Maravilhoso seus trabalhos. Adorei!
Obrigada!
MARAVILHOSO!
Thank you soooo much. God bless :*
WOW!! Thank you so much. It is great.
Merry Christmas and Happy New year to you, John and Coco
Love,
Elsa Lucia
Leyla, you have the best Christmas Nativity, and just so good timing that I am thrilled to try them out so that i can make some 100% Christmas related gifts to people who have not believed in the Christ the Savior, or those who do not really know the true meaning of Christ-mas, I believe that this will be the greatest gift set(s) that I have been given out. Thank and thanks again, wishing you a very true Christmas, when you are in Christ.