


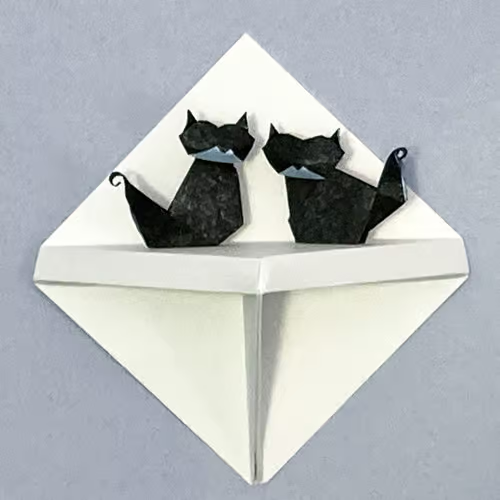
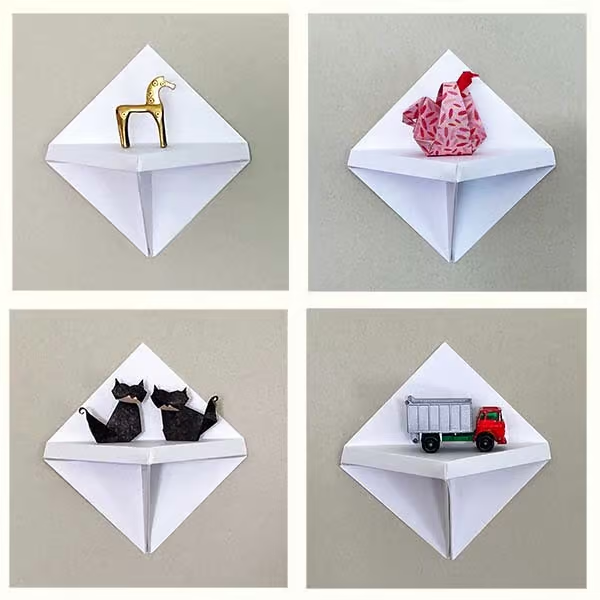
Looking for an elegant and easy way to display the origami figures you make? Or perhaps for a collection of miniatures or toys? This easy-to-make paper shelf is a perfect way to showcase your treasures!
The designer of this shelf, V’Ann Cornelius, used these origami shelves for the many exhibitions she helped organize at the Origami USA annual convention.
We should consider her vision when displaying our origami, “To build an environment that rests on two concepts: respect for the art of origami and respect for the visitors”.
Diagrams for this paper shelf are found in Issue #92 of The Paper (The Magazine of Origami USA) and the video tutorial is presented here by permission.
The following video shows how to make an origami shelf

Materials you need
- At least two square pieces of paper (about 8.5 x 8.5 inches) cut from a letter-size printer paper.
Tips to fold the Paper Shelf
- One of the pieces you will be using is to create a folding template. You can use it to create shelves that have a consistent width.
- You can use regular printing paper or a little thicker such as cardstock.
- If you use thicker paper you might want to consider using an inkless pen and a ruler to score the paper.
We would love to see your origami shelf and how you use it. Join our Facebook Group and post a picture so we all can see it and applaud your work!
¡Perfecto!! Extraño V-Ann. Era muy lista. I was lucky enough to meet her at the last origami convention she attended. I had no idea she had cancer at the time.
Does anyone have the pattern for the shelves that she designed for the OUSA Easr Coast Conventions? They were a set of zig zags intersected by shelves at the front and the back. I remember helping put them together but continue to regret that I did not take more notice and keep notes.
Hi Berry and welcome to Origami Spirit. V’Ann was a fantastic person. I will always remember her arranging the exhibition.
I don’t know the shelves you mention but if I come across some information or instructions, I will share!
Que hermoso, en sus presentaciones de cada semana me fijaba en la decoración que tiene detrás en la pared y siempre quería aprender a hacer esa figura que es tan útil. Muchas gracias Leyla por compartirla de forma tan sencilla como siempre. Un abrazo.
Me alegra que hayas encontrado este modelo tan útil y sencillo.
Gracias por tu visita!
Leyla
Great little shelf. If you hang it upside down, you get two smaller platforms. Then if you stand it on a flat surface (tucking the big flap under) and put another one back to back you have four small spaces that you can rotate and admire four little treasures.
All great ideas, Renee, Thank you for sharing them!