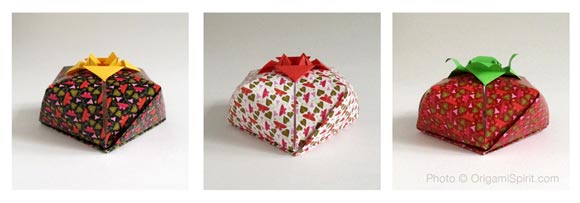
Based on the traditional Japanese menko, this brilliant origami box, created by Carlos Bocanegra, will become one of your favorite origami boxes for sure. So, find yourself a couple of pieces of origami paper, sit down and let your fingers do the tomato dance!
Not only will Carlos’ model offer endless pleasure in the folding, but his origami box will teach other basic origami lessons as well. And all the while serving as a prime example of how to be creative with origami!
How did Carlos develop the idea for his origami box?
To the original Japanese paper envelope, Carlos added a few folds which turned the flat menko into a 3D form. For the leaves, he then made a smaller menko and left it flat. The flaps of the larger menko/tomato are inserted into the smaller menko/leaves.
The flaps of the tomato remain fixed to the smaller menko through the friction of the paper. To keep the flaps of the tomato from pulling apart, the leaves may be secured with a small dab of glue.
To secure the flaps of this origami box without the need of glue, I came up with a variation for the top, using a windmill base.
Here is the video showing how to make the tomato base and two different tops of this origami box. Thank you Carlos for your permission to present this fabulous model.
Suggestions and tips
– Become familiar with folding the menko shown in this video.
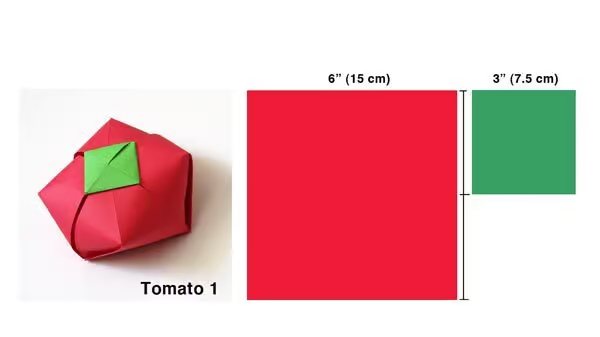
– For the original box, as Carlos designed it, you need two squares of paper: a big red square and a small green square.
– Paper with the same color on both sides is preferable, but duo color will do as well.
– Paper Size The base can be made with any size square, and the leaves with a square whose side is half of the bigger one. For example: 6 x 6 inches (15 x 15 cm) for the big square, and 3 x 3 inches (7.5 x 7.5 cm) for the small square.
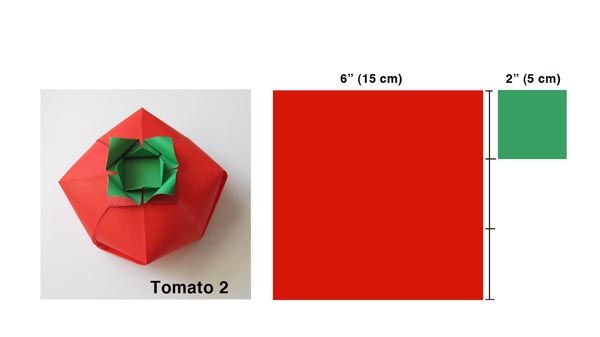
– For the second version, make the leaves with a square whose side is one third of the bigger one. For example: 6 x 6 inches (15 x 15 cm) for the big square, and 2 x 2 inches (5 x 5 cm) for the small square.
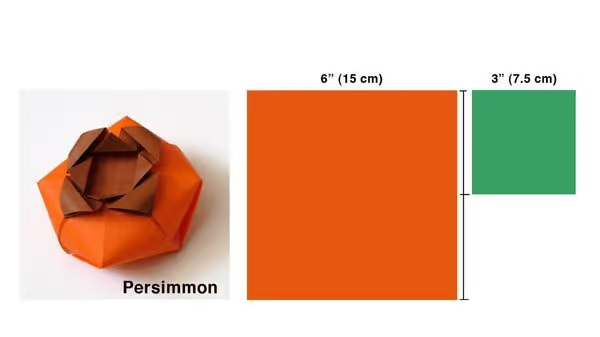
-To make this origami box look like a persimmon, use an orange square for the base and make the leaves with a brown square whose side is half of the bigger one. For example: 6 x 6 inches (15 x 15 cm) for the big square, and 3 x 3 inches (7.5 x 7.5 cm) for the small square.
– Types of paper The paper can be regular origami paper, but I’ve found that thicker paper such as colorful office paper works even better.
– I also made these origami boxes using printable patterns of my own design. I printed the patterns on white office paper. They work great!
These paper designs are available for sale on this website as an instant download (pdf file). Your purchasing these printable patterns will add some nice options to your collection of origami papers, and will support our bringing you video tutorials like the one posted on this article.
Click here to buy unique printable origami paper designs.
. . . . . . . . . . . .


Thank you Leyla for sharing your wonderful, beautiful way of folding paper. This amazingly versatile project is on my list to fold for this coming Christmas as boxes for tucking in handmade jewelry. Please keep producing your inspiring origami videos.
Thank you for sharing such a versatile little project. Can’t wait to use these with gifts!
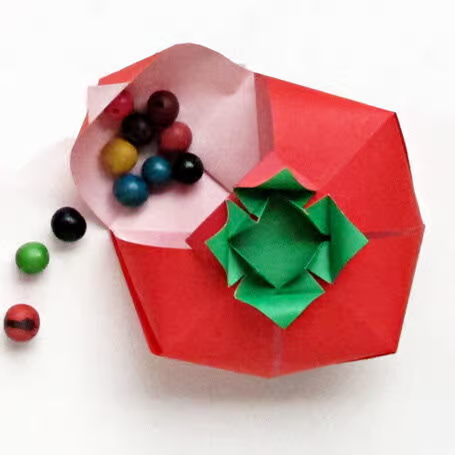
P.S. I came up with a small folding variation ~ instead of folding the inner tips of the leaves up and outward, I sometimes take a toothpick and roll the tips down and inward. Looks a little more, perhaps, like a real tomato. And seems to hold the box together we well. The two red tomatoes in my photo illustrate this.
Great idea Sheree. It is always nice to see and hear about variations to these pieces. Thank you for sharing!
Leyla, thank you so much for posting this wonderful, clear, and easy-to-follow video! A while ago I came across another video of yours which, if I remember correctly, made mention of the tomato-shaped box, but I couldn’t find a video of instructions for that. I was so glad to discover this video is now available! I’ll be teaching it at a 4-day origami convention, Centerfold, held in Worthington, Ohio this weekend ~ giving you full credit, as well as Carlos Bocanegra. My own additions to the collection of ideas are a green tomato, and a pumpkin. Photos available at https://www.facebook.com/sheree.green.92.
Hi Sheree,
The video where you saw the tomatoes was the one for the Menko: http://youtu.be/D0pVkNDSv-I
I hope your class went well and you had a lot of fun at Center Fold. Nice photo in FB!
I am truly laughing ! I followed intrx for 3 weeks and finially finished with some alien orange space ball. It’s just too much fun and I thank you for all your videos.
I have a problem to view the video, it is horrible. I will come back later
Leyla, you have really good works
Thank you Leyla for teaching this to me at the NYC Convention this year. It is a favorite. Elegant.
super bravo merci
Thank you for posting this video Leyla. I thoroughly enjoyed your workshop on this model at the OUSA convention! This comes just in time to refresh my memory of the folding sequence.
Kind regards.
You are welcome Sandra. Taking notes when we are learning live is hard. I’m glad you enjoyed the class and the video for this origami box.
they’re stackable too!!!! :-)
Thank you Linda. I would love to see a photo of how you stack them!
very useful and beautiful model!!! Thanks so much for sharing!
Your work is really cool, and beautiful! I like very much Origami and those things with paper!
Lovely! thanks for this tutorial and to Carlos for sharing this design, I’m always especially impressed by the imagination it take to design round, organic-shapes in origami. I love the different variations too :) Rose
very nice, leyla!
Thanks, I like the giftbox very much. I will use this when somebody has his birthday or something like that. Greetings from Holland.
I like it! I think, it is really beautiful.